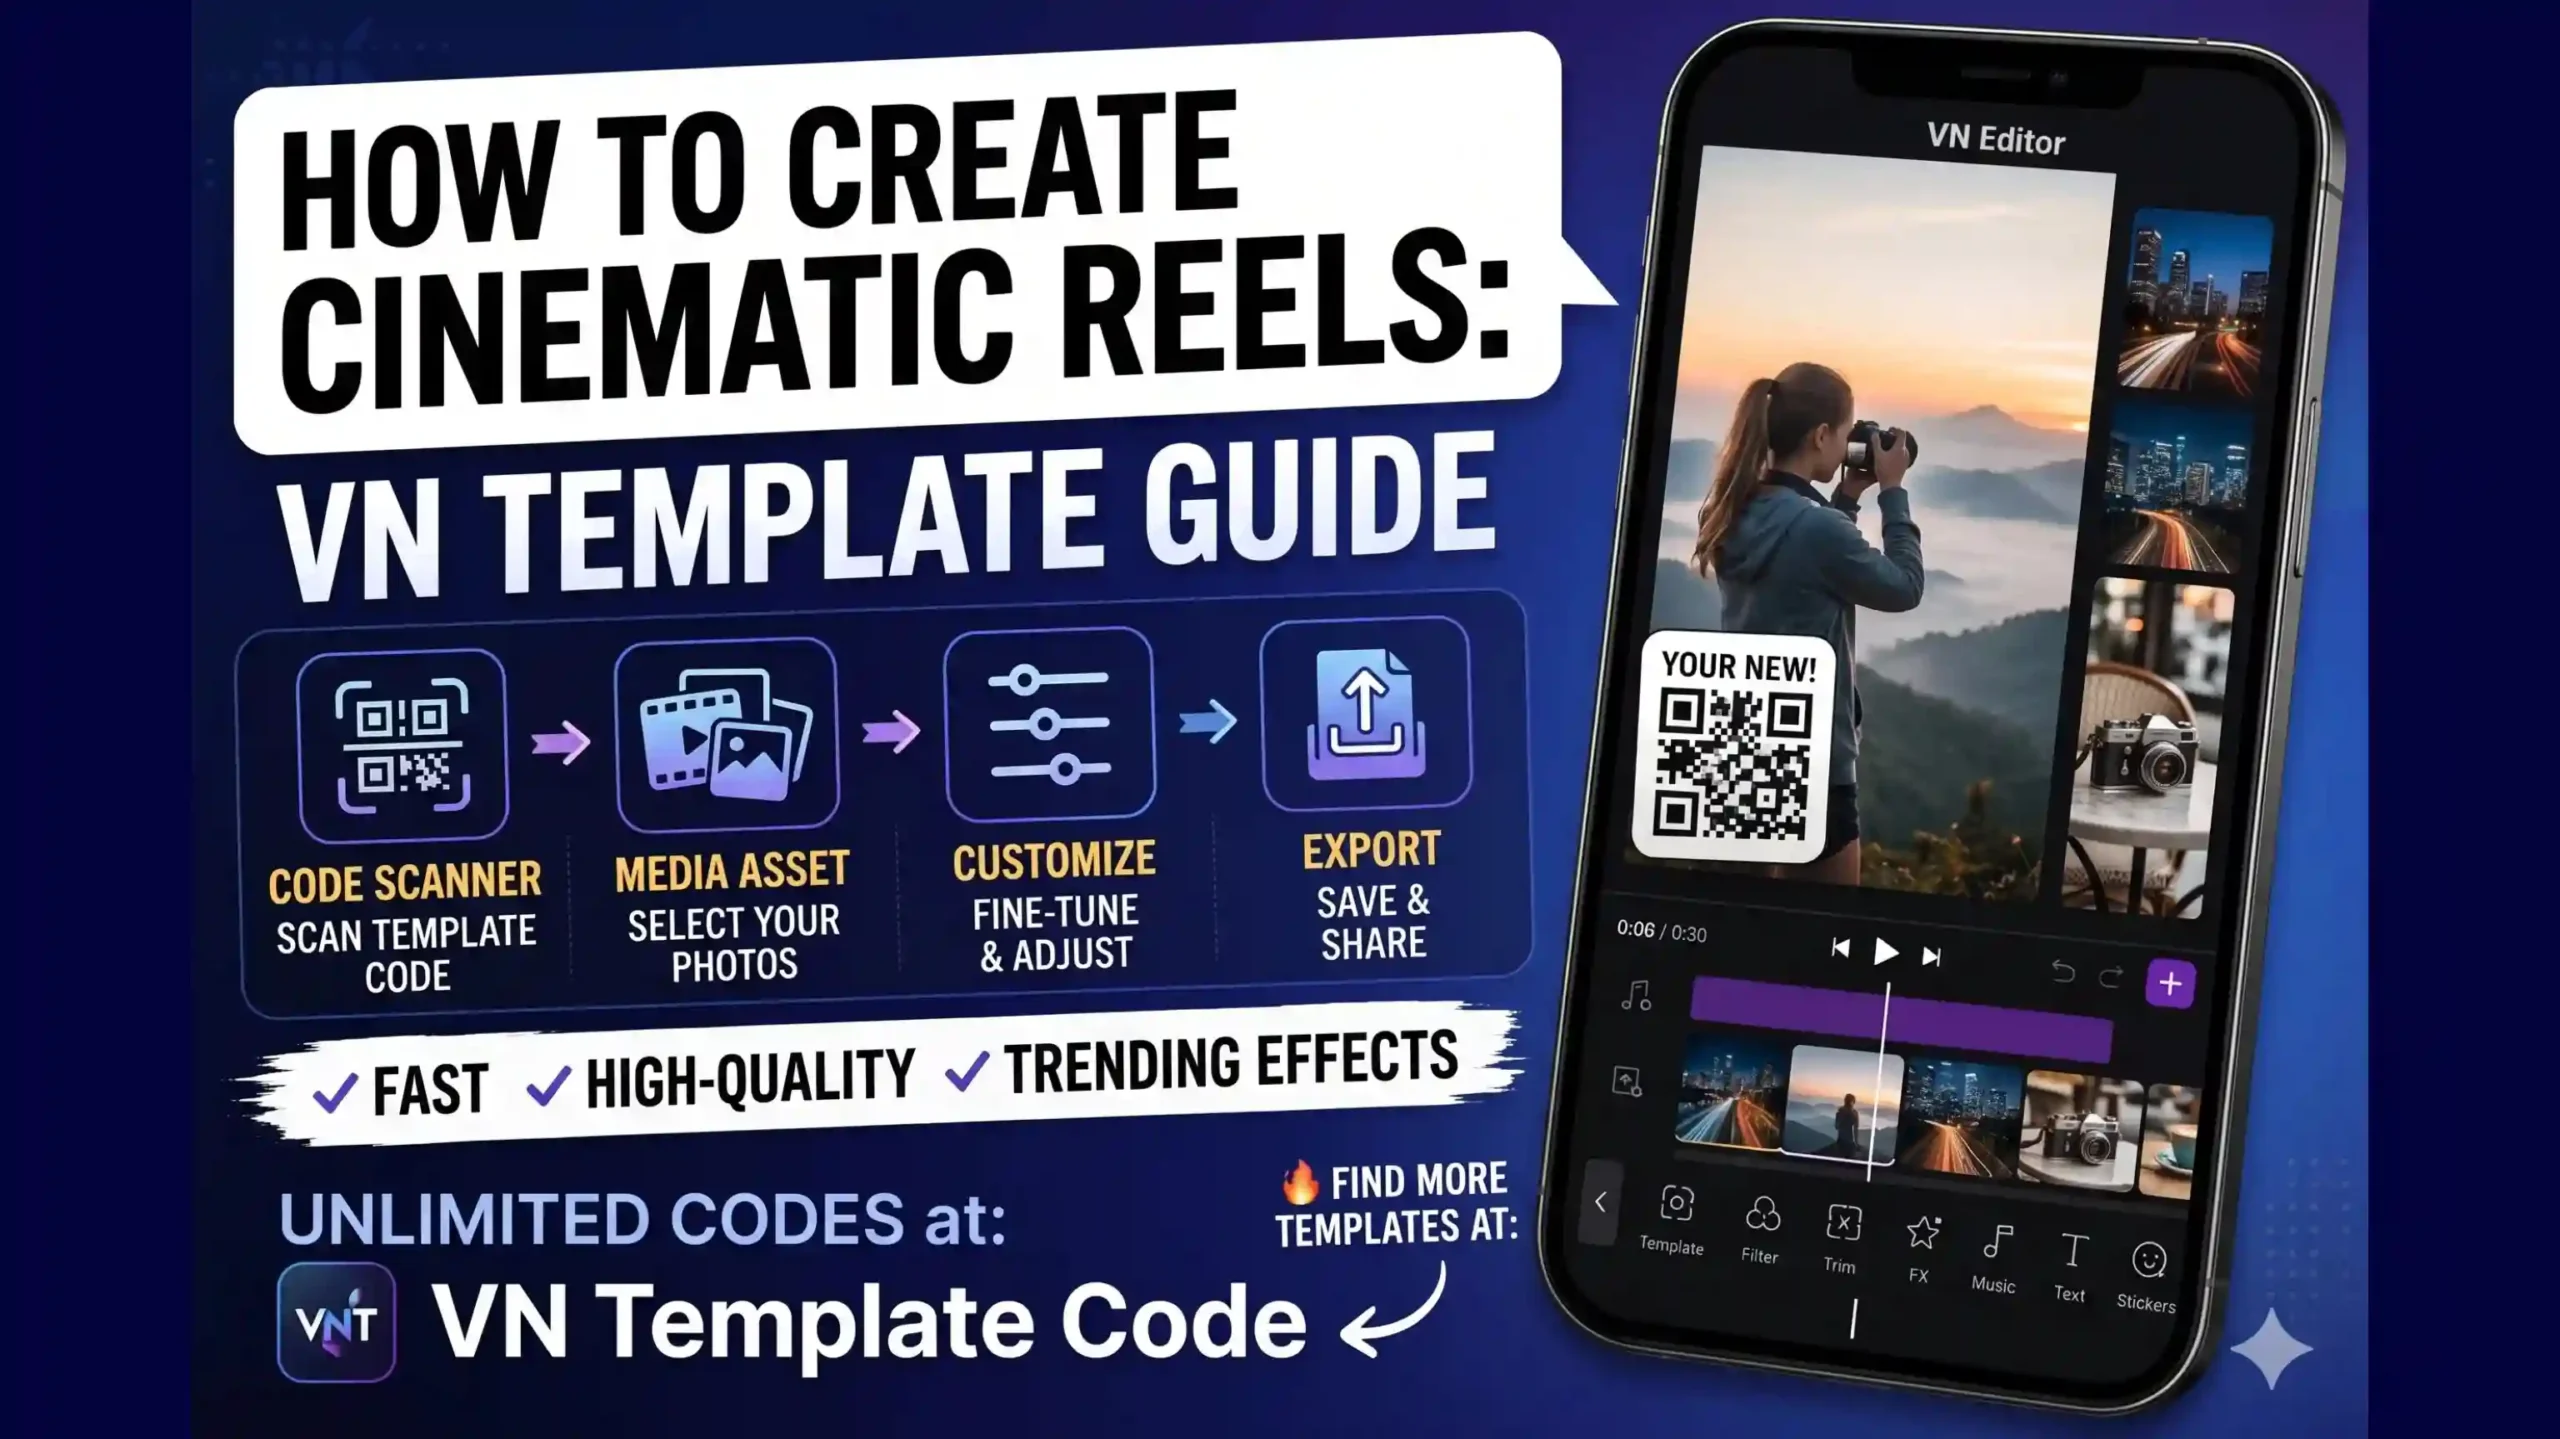
In today’s fast-paced digital world, almost everyone is active on social media and wants to keep up with the latest viral trends. Whether it is Instagram Reels, YouTube Shorts, or TikTok videos, uploading engaging short-form content has become the best way to stand out. However, not everyone possesses professional video editing skills. Many creators often struggle to produce high-quality videos, feeling left behind by the competition.
Fortunately, modern video editing applications have made the process incredibly easy. Among the top tools available today, VN Video Editor stands out as one of the best choices. It is a powerful yet completely beginner-friendly app used by both casual creators and professional editors to produce stunning, high-quality content.
The best part about VN Video Editor is its intuitive and simple interface. In this comprehensive (VN Template Editing Guide) guide, we will break down everything you need to know to master the app. Even if you have never edited a video before, this step-by-step tutorial will help you build your confidence. By the end of this article, you will have the skills to create impressive videos that can capture the attention of thousands—or even millions—of viewers across social media.
Let’s dive right in!
🤔What is VN Video Editor?
VN Video Editor is a powerful, free, and highly user-friendly application that enables creators to produce professional-quality videos directly from their smartphones or computers. Unlike many other editing platforms in the market, VN stands out because it offers advanced editing features without adding any watermark to your exported videos.
Whether you are crafting content for YouTube Shorts, Instagram Reels, TikTok, Facebook, or personal projects, VN provides a complete suite of tools under one roof.
Key Features at a Glance:
- Precision Trimming: Easily cut, split, and arrange video clips on a multi-track timeline.
- Cinematic Transitions & Filters: Smoothly connect your clips and apply professional color grading presets.
- Audio & Music Integration: Insert background tracks, sound effects, or voiceovers effortlessly.
- Keyframe Animations: Create custom motions and effects to make your videos more dynamic.
- Advanced Text & Subtitles: Add stylish fonts, titles, and text animations natively.
The best part about VN Video Editor is that it eliminates the steep learning curve. Even if you are opening the app for the very first time, its intuitive design ensures that you can create high-quality, engaging content with minimal effort.
🤔What is a VN Template?
A VN Template is a pre-made video editing project generated using the VN Video Editor application. A template already has every transition, animation, effect, text, and beat, so you don’t have to spend hours manually changing each one.
Think of it as a pre-designed video arrangement.
Everything you need to do is:
- Open the template.
- Replace any example photographs or videos with your own.
- Make modest modifications as required.
- Export your final video.
You can make a professional-looking video in few minutes, where it generally takes hours of editing.
🤩Why Should You Use a VN Template?
Using VN Templates has several benefits, particularly if you are new to video editing.
Some of the most significant benefits include:
- This saves hours of editing time.
- No hard editing abilities are necessary.
- Makes professional-quality films rapidly.
- Includes pre-made effects, transitions, and animations.
- Ideal for social media material.
- Easy to personalize with your own photos and videos.
- Helps to maintain a clean and consistent editing style.
Whether you’re making a birthday video, trip montage, cinematic edit, or trending reel, VN Templates help the process go lot faster and smoother.
How to Create Videos Using VN Templates (Step-by-Step Guide for Beginners 2026) | VN Template Editing Guide
This full step by step guide will teach you how to create professional videos with VN Templates. This tutorial is great for beginners and will guide you through anything from opening up a template to exporting your final video in high quality.
How to Get Unlimited Free Trending VN Templates

To begin creating your viral videos, the first step is to access our premium resource library. Here is exactly how to do it:
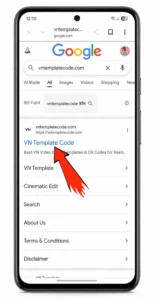
1- Visit Our Platform: Open your preferred mobile or desktop browser and go directly to our official website: VN Template Code.
2- Explore the Library: Once the homepage loads, you will gain immediate access to an unlimited collection of free, high-quality, and trending video editing templates.
3- Select a Trend: Browse through the latest uploaded designs or use the search bar to find a specific style that matches your upcoming project.Selecting Your Desired VN Template or Search for the Template

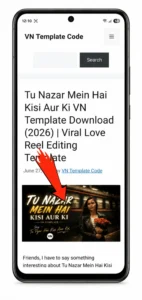
Once you open the homepage, you will see a wide variety of trending templates categorized for your convenience. You can either scroll through the latest updates or use the search bar to find a specific style.
For this tutorial, let’s use the viral “Tu Nazar Mein Hai Kisi Aur Ki VN Template” as our practical example, which you can see highlighted in the screenshot below.Downloading the Template QR Code
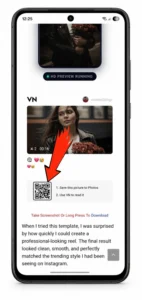
Once you open the dedicated page for the “Tu Nazar Mein Hai Kisi Aur Ki VN Template” (or any other template of your choice), you will see an image featuring a custom QR Code. This code contains all the pre-set data for your video project.
To save this template asset to your device, you can use either of these two easy methods:
Method 1: Long-press on the QR code image and select “Download Image” to save it directly to your gallery.
Method 2: Simply take a quick screenshot of the QR code on your screen and crop it if necessary.
With these initial setup steps complete, you now have the required template asset saved on your device. We are completely ready to launch the VN Video Editor application and start importing our media!Open the VN Video Editor App
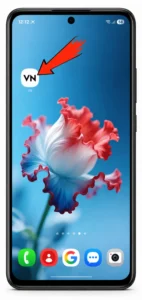
To get started, tap on the VN Video Editor icon on your device to open the application.
💡 Pro-Tip: Before you begin, make sure you are using the latest version of the VN app. Updating the app ensures you get all the new features and a glitch-free editing experience. If you haven’t updated it yet, you can quickly Download the Latest Version here [ Download ].Scanning QR Code in VN – Video Editor

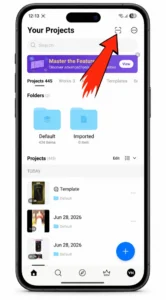
Once the VN App opens, make sure you are on the VN Editor Home window.
Look at the top-right corner of your screen—you will see a Scan Icon (it is the very first icon). Tap on this icon to open the built-in scanner.
Now, you have two ways to import your template:
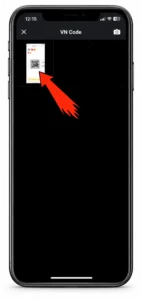
1- Scan Directly: Use your camera to scan a printed or on-screen QR code.
2- Upload from Gallery: If you have already downloaded the VN Template QR code from our website, simply choose the option to upload it directly from your phone’s gallery.Why this VN QR Code is Important (and How to Scan It)
This VN Code or QR Code is the core of the entire editing process. It contains all the pre-configured effects, filters, and transitions needed for your video.
Confused about how to scan a QR code stored on the same phone? Don’t worry, you don’t need a second device! VN Video Editor makes this incredibly easy.
Instead of using your camera, just click the option to upload from your gallery within the app’s scanner, and select the downloaded VN Template image. The app will automatically read the QR code and load all the assets instantly.Load and Preview the Template
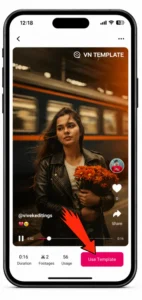
As soon as the QR code scan is complete, a new preview window will pop up. Here, you can watch the reel play and see exactly how the music, transitions, and effects will look on your video.
Once you are ready to use it, simply tap the Use Template button located at the bottom-right corner of the screen.
⏳ Note: The app will take a few seconds to download the template assets. You will see a progress bar loading from 0% to 100%. Just wait for it to finish!Add Your Photos and Videos
Once your chosen VN template finishes downloading, you are ready to start creating!
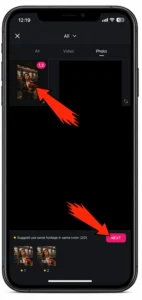
Tap on the “Use” button inside the app.
Select your media: Choose the photos, videos, or a mix of both that you want to include in your project.
Pro Tip: Make sure your media files are organized in your gallery beforehand so you can find and import them quickly!Export Your Final Video

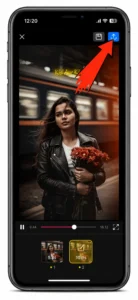
After you finish selecting your media and polishing your video, you have reached the final stage of your editing process.
Locate the Export Icon: Look at the top-right corner of your screen and click on the export icon (it is the second icon from the right).
Don’t worry about quality settings just yet: You don’t need to stress about tweaking the resolution, frame rate, or bit rate beforehand. All of these media quality settings will neatly pop up right after you click that export button.Customize Settings and Save
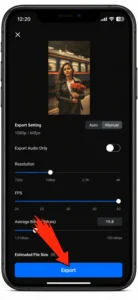
As soon as you tap the export icon, a settings window will pop up on your screen.
Adjust Your Quality: You can customize the resolution, frame rate (FPS), and bit rate here based on where you plan to share the video.
Export and Share: Once you are happy with the settings, hit the final export button.
And that’s it! Your video is fully rendered and ready to smash your previous view records on Instagram Reels, YouTube Shorts, or TikTok.
Video Tutorial: How to Create Videos Using VN Templates
Tips for Better Results 🤪
To improve the quality of your videos, follow these simple tips:
- Use high-resolution photos and videos,
- Avoid blurry or low-quality clips,
- Keep them well-lit,
- Match the mood of the template,
- Use trending music,
- Preview the entire video before exporting,
- Export in Full HD whenever possible